How to Disable TextField in Flutter
Even though rare, you may want to disable your TextInput widget in some scenarios. In this Flutter tutorial, let’s check how to disable TextField.
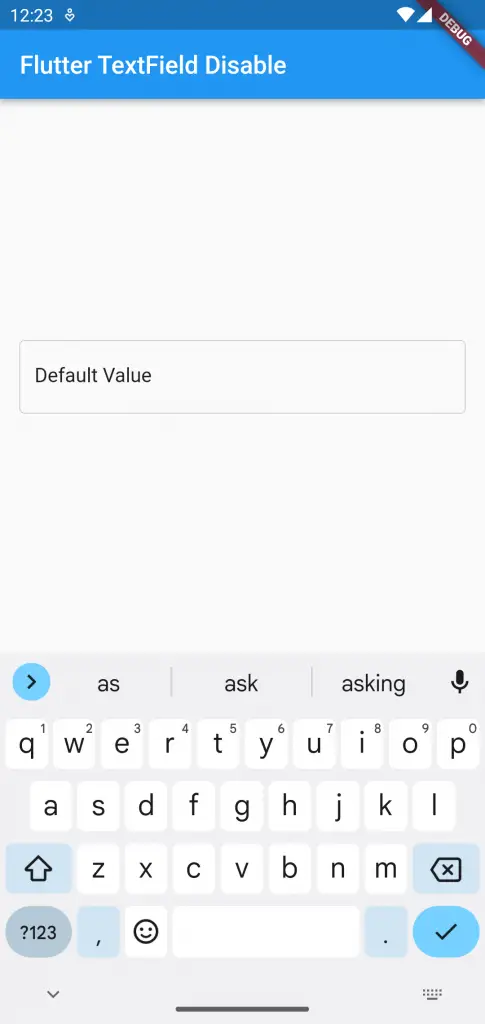
Disabling TextField is very easy. TextField has a property named enabled. Just make the enabled prop false to disable the TextField.
See the code snippet given below.
TextField(
        enabled: false,
        controller: _controller..text = 'Default Value',
        decoration: const InputDecoration(
          border: OutlineInputBorder(),
        ),
        onSubmitted: (String value) {
          debugPrint(value);
        },
      ),
Following is the output.
Following is the complete example.
import 'package:flutter/material.dart';

void main() {
  runApp(const MyApp());
}

class MyApp extends StatelessWidget {
  const MyApp({super.key});

  @override
  Widget build(BuildContext context) {
    return MaterialApp(
      title: 'Flutter Demo',
      theme: ThemeData(
        primarySwatch: Colors.blue,
      ),
      home: const MyHomePage(),
    );
  }
}

class MyHomePage extends StatelessWidget {
  const MyHomePage({super.key});

  @override
  Widget build(BuildContext context) {
    return Scaffold(
        appBar: AppBar(
          title: const Text('Flutter TextField Disable'),
        ),
        body: const MyStatefulWidget());
  }
}

class MyStatefulWidget extends StatefulWidget {
  const MyStatefulWidget({super.key});

  @override
  State<MyStatefulWidget> createState() => _MyStatefulWidgetState();
}

class _MyStatefulWidgetState extends State<MyStatefulWidget> {
  late TextEditingController _controller;

  @override
  void initState() {
    super.initState();
    _controller = TextEditingController();
  }

  @override
  void dispose() {
    _controller.dispose();
    super.dispose();
  }

  @override
  Widget build(BuildContext context) {
    return Center(
        child: Padding(
      padding: const EdgeInsets.all(16.0),
      child: TextField(
        enabled: false,
        controller: _controller..text = 'Default Value',
        decoration: const InputDecoration(
          border: OutlineInputBorder(),
        ),
        onSubmitted: (String value) {
          debugPrint(value);
        },
      ),
    ));
  }
}
That’s how you disable TextField in Flutter. If you want to make TextInput read only then go here.